Google Ads Audit Checklist
Google Ads
Google Ads Audit Checklist — Not Getting Leads or Bookings? Let's Fix That.
Something is off and you want answers. Good — that means you are ready to take action. This checklist will walk you through every piece of the system so you can find the problem and fix it fast. No guessing, no stressing. Just check each box as you go and you will know exactly where things stand.
Grab a coffee, open Google Ads in one tab and your CRM in another, and let's do this together. Check off each item as you go!
Here is how your system works from start to finish:
Every piece needs to be working for leads to turn into bookings. If one step breaks, everything after it stops. So let's check them one at a time.
Step 1 — Google Ads Setup
This is where it all begins. If your ads are not set up right, nobody is clicking — and no clicks means zero leads. Let's make sure the foundation is solid.
Keywords in Phrase Match
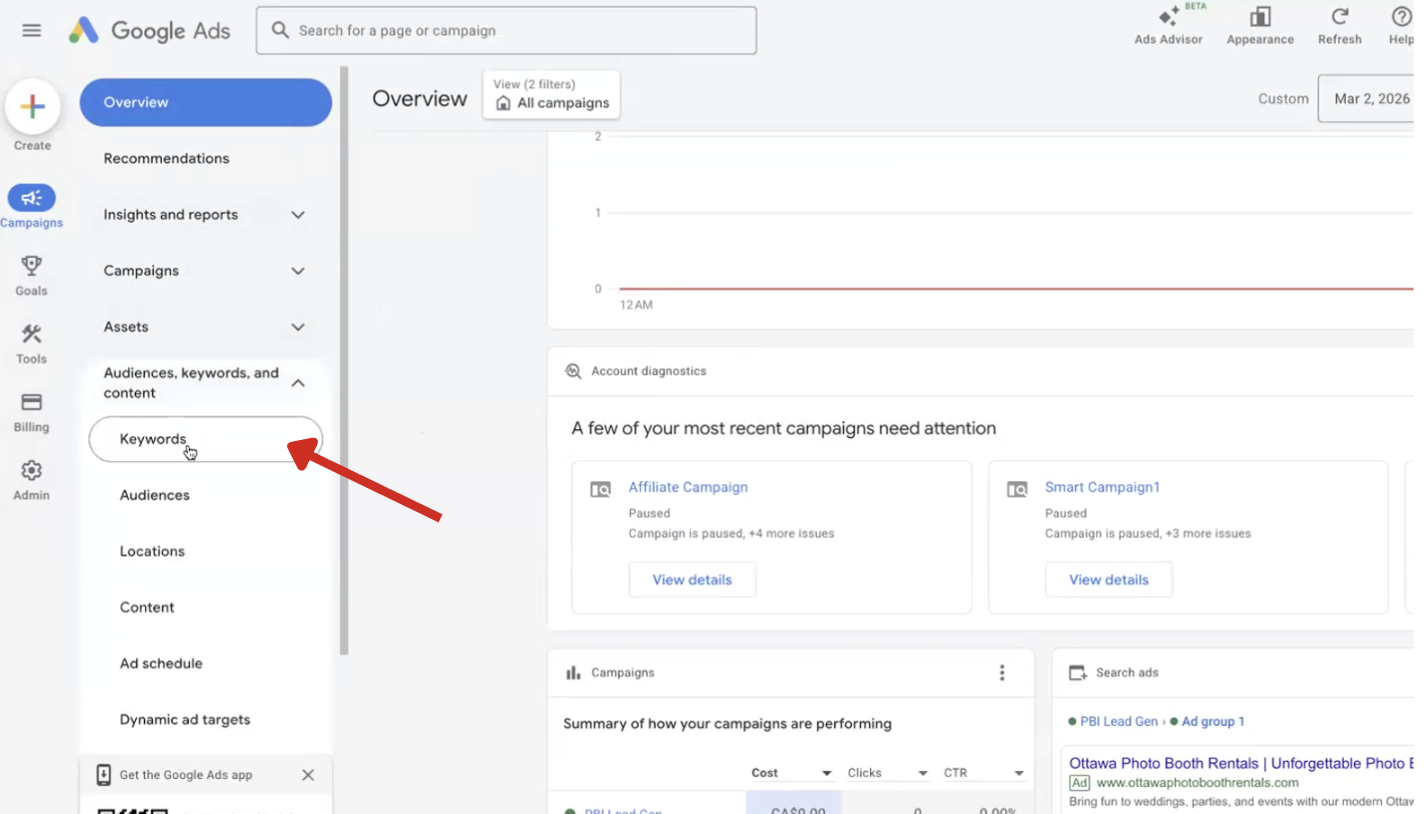
Open Google Ads and go to your Keywords tab. In the left sidebar, expand "Audiences, keywords, and content" and click on "Keywords" as shown below:
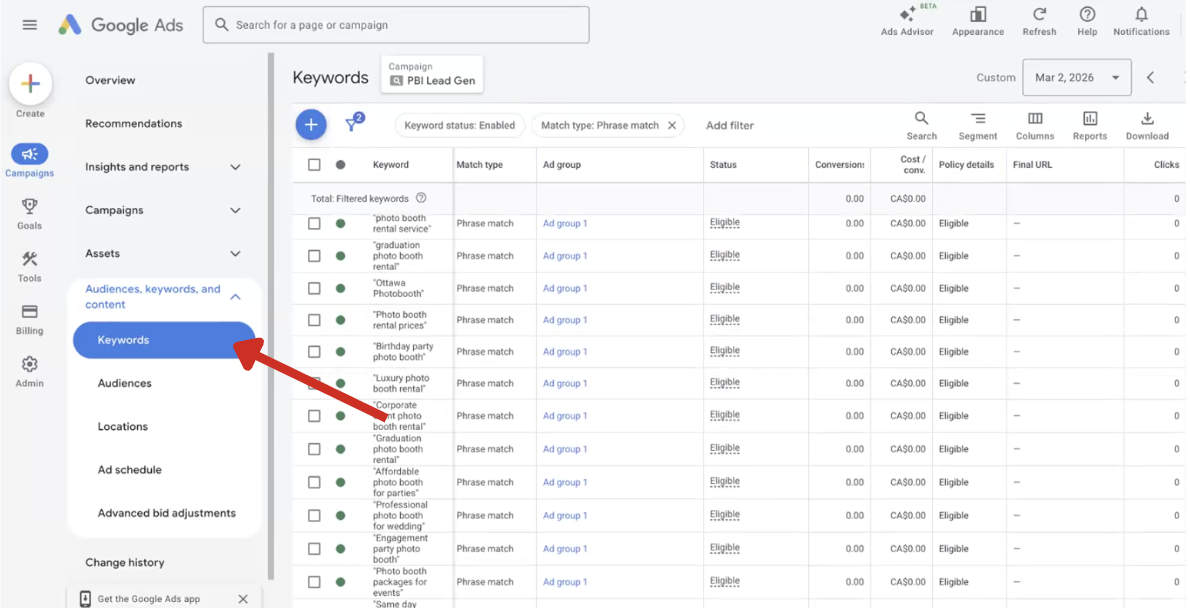
Look for quotation marks around each keyword, like this: "photo booth rental". If you see quotes, you are good. If not, your ads might be showing up for random searches that have nothing to do with your business — and that burns through your budget fast. Your keywords should all show "Phrase match" in the Match type column:
Getting Enough Clicks
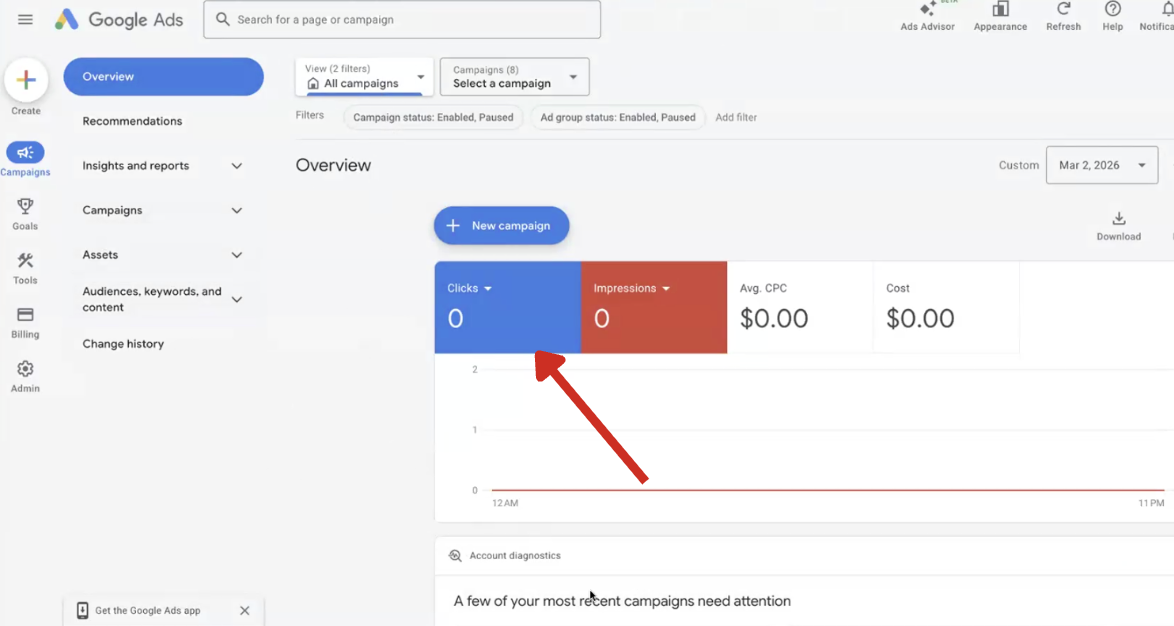
While you are in the Keywords tab, look at the Clicks column. You want at least 5 to 10 clicks per week on your main keywords. If clicks are low or at zero, your bids are probably too low. Bump them up by 25 to 50 percent and check back in a few days. Check your Clicks and Impressions in the Overview dashboard:
Location Targeting
Go to your campaign settings and open the Locations section. Make sure you are only targeting areas you actually serve. Remove anything outside your range and add any nearby cities you might have missed. In the left sidebar under "Audiences, keywords, and content," click "Locations" to see your targeted area on the map:
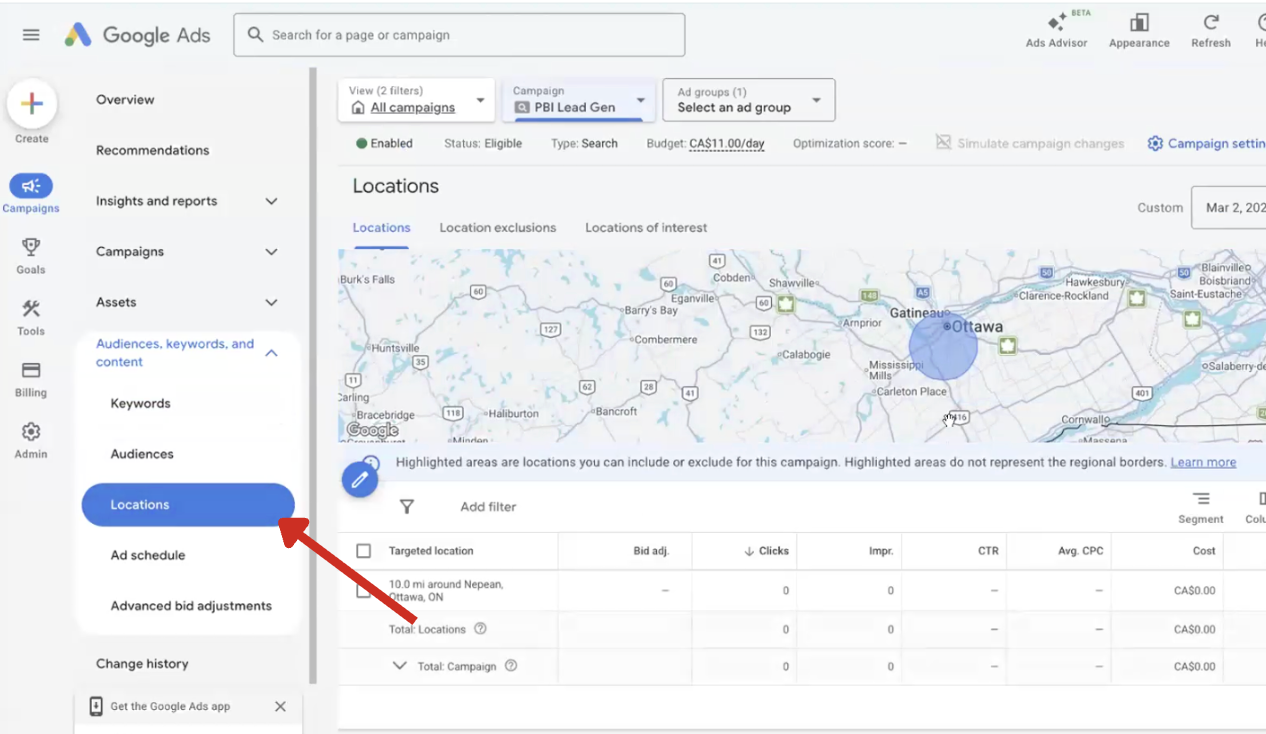
The $1 Per Mile Budget Rule
Here is a quick way to know if your budget is big enough: spend at least one dollar per day for every mile of your service radius. Serving a 25-mile radius? Budget at least $25 per day. Covering 40 miles? That is $40 per day minimum. Anything less and you are not getting enough eyeballs on your ads.
AI Max Is OFF
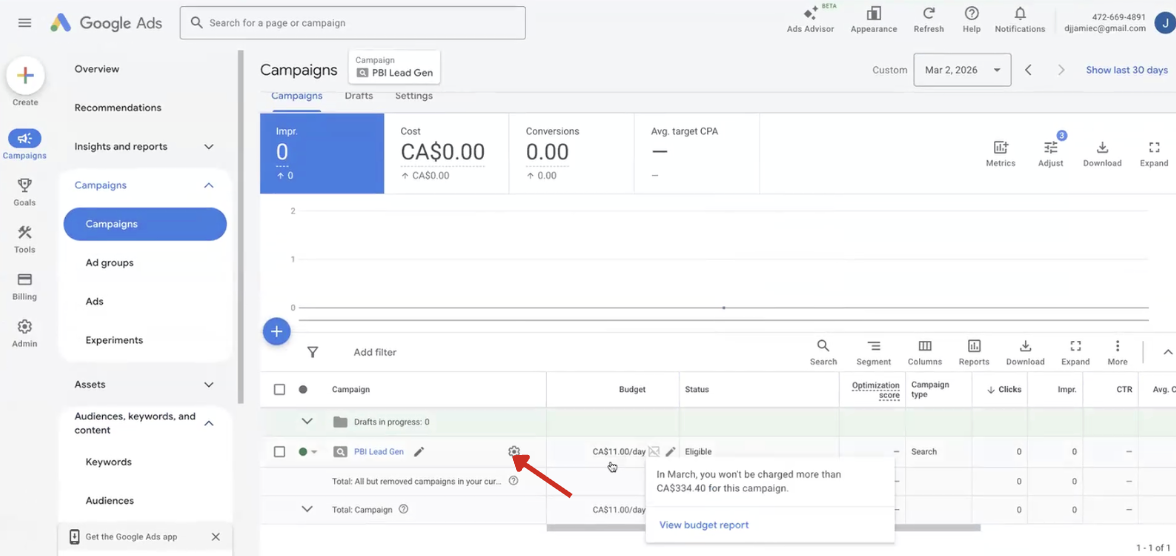
This one trips up a lot of people. Go to Campaign Settings, then look for Additional Settings or Automatically Applied Recommendations. If it is turned ON, Google is making changes to your account behind your back — changing keywords, adjusting bids, expanding your targeting. Turn it OFF right now if it is on. This is a big one. Click into your campaign and look at the Settings tab:
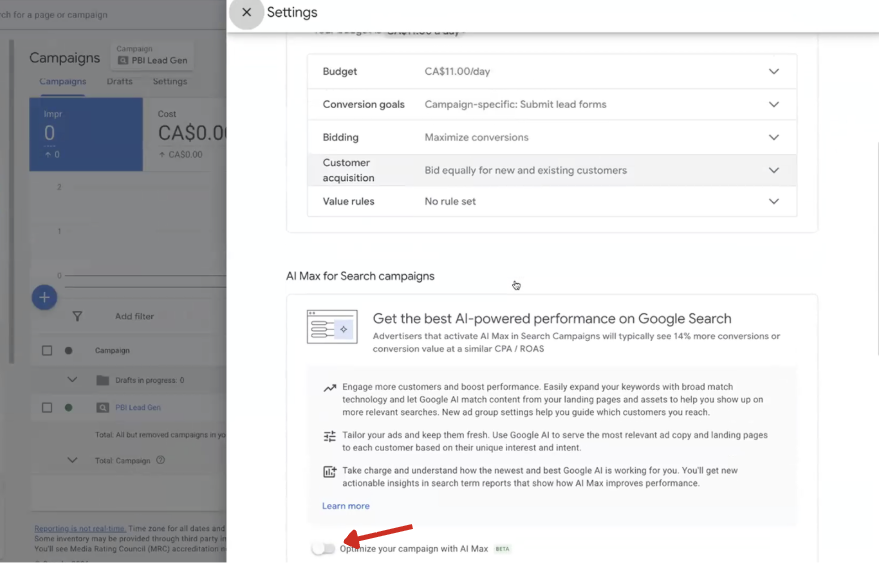
Scroll down to find the "AI Max for Search campaigns" section. Make sure the toggle for "Optimize your campaign with AI Max" is turned OFF as shown here:
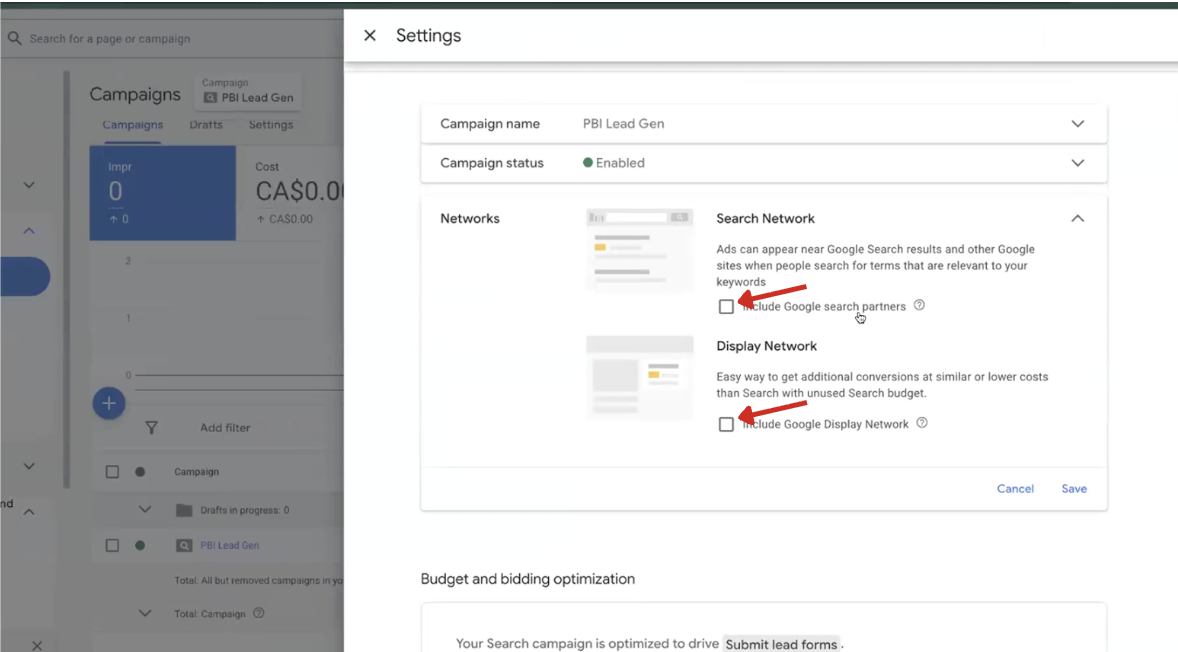
While you are in Campaign Settings, also make sure Display Network and Search Partners are unchecked. Display Network shows your ads on random websites and apps instead of Google Search — that is not where your leads are. Search Partners shows your ads on non-Google search sites where the traffic quality is usually much lower. Both of these waste your budget on low-quality clicks. Uncheck them both. In the Networks section of your settings, both checkboxes should be unchecked:
Notifications
Before moving on, check for any notifications or errors in your Google Ads account. Click the bell icon in the top-right corner of your Google Ads dashboard and look for any alerts:
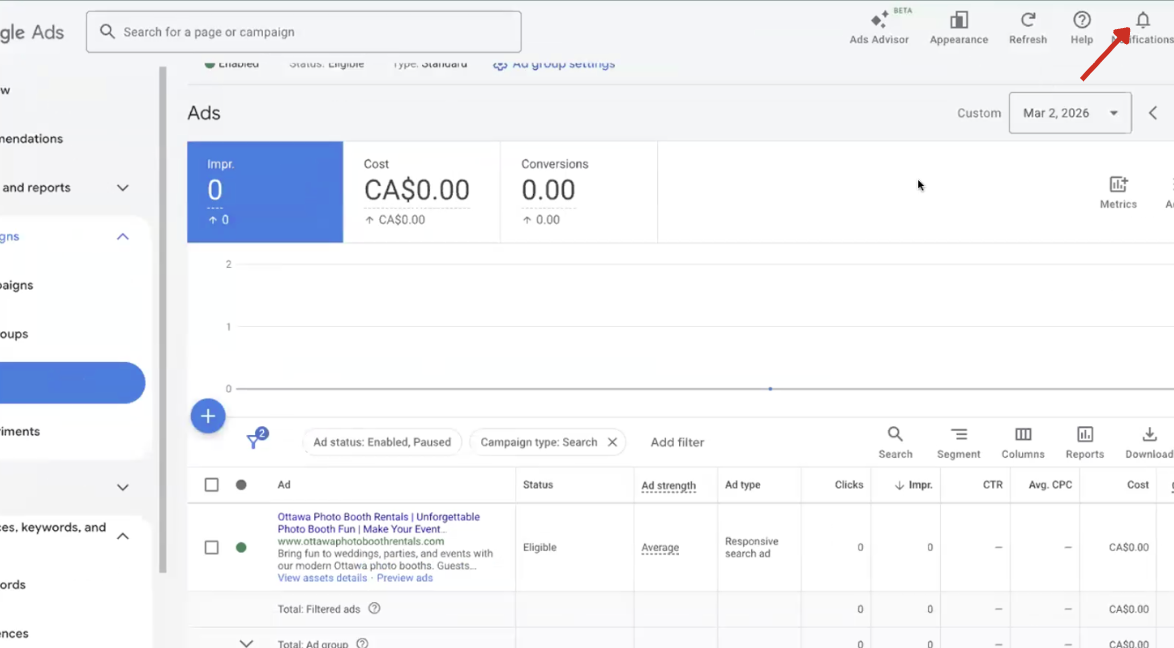
You are looking for anything that could be stopping your ads from running — things like payment errors, advertiser verification requests, ID verification, address verification, or tax ID number issues. If you see any of these, resolve them immediately because your ads will not run until they are cleared.
Step 1 complete! If everything above checks out, your ads are in great shape. Let's move on to your landing page.
Step 2 — Landing Page Check
Your landing page is where people end up after clicking your ad. If something is broken or slow here, people bounce and you lose the lead before it even starts.
Correct URL in Your Ads
Go to your Ads section in Google Ads and check the Final URL. In the left sidebar under Campaigns, click on "Ads" to see your ad listing:
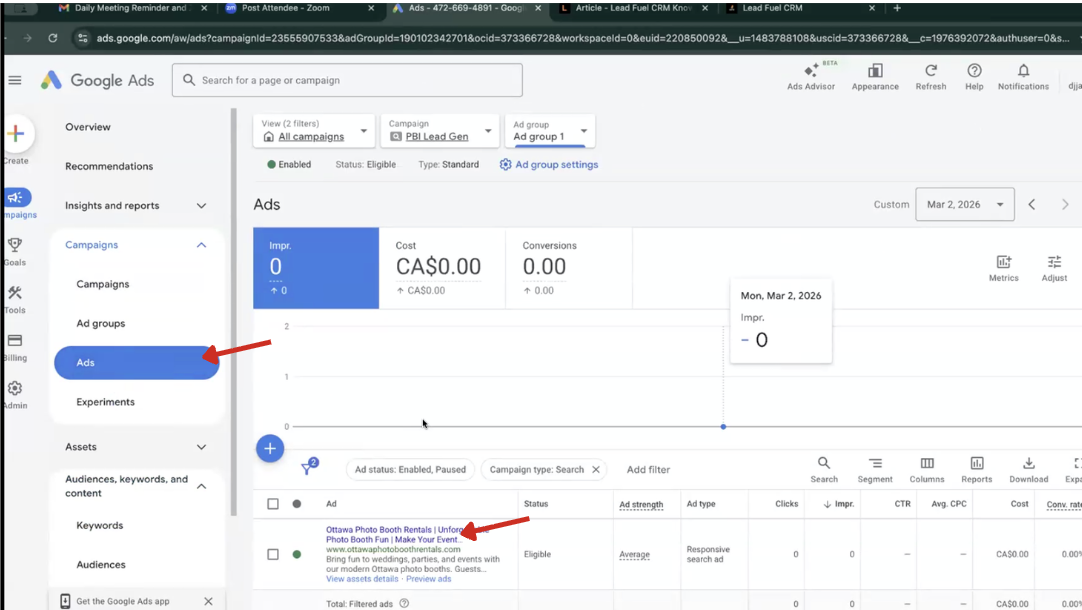
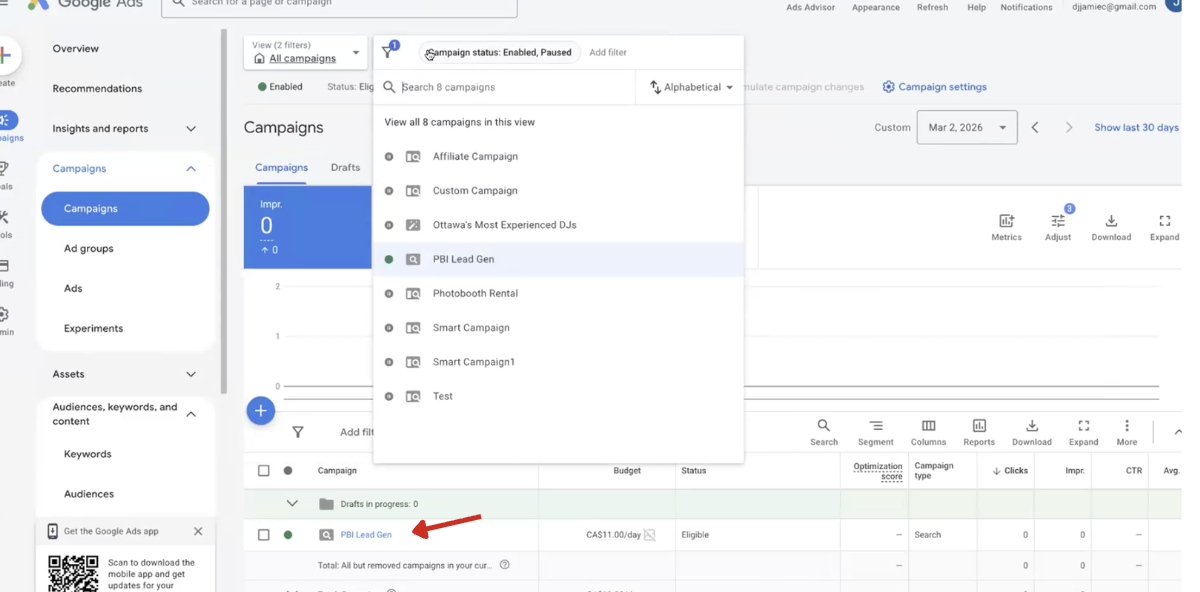
It needs to point to your Lead Fuel CRM funnel — not your old website, not some random page, and not someone else's platform. If the URL is wrong, that is likely your entire problem right there. You can also verify this from your Campaigns list view — click on your campaign name and check the Final URL column:
Desktop Form Test
Open your funnel on a computer and actually fill out the form. Submit it. Does the Thank You page show up? Do all the fields work? If not, you just found your problem.
Mobile Form Test
This is where most issues hide. Pull out your phone and fill out the form. Tap every button. Make sure it submits. Try it on both iPhone and Android if you can. Most of your leads are on their phones — if the form is broken on mobile, you are invisible.
Step 2 done! Your landing page is looking good. Now let's make sure leads are actually landing in your CRM.
Step 3 — Crm Setup Check
Leads hit your funnel, fill out the form... but where do they go? If your CRM is not receiving them or notifying you, leads are slipping through the cracks without you knowing.
Submit a Test Lead
Go to your funnel right now and fill it out with your own real contact info. Then wait 2 to 3 minutes.
Lead Shows Up in CRM
Log into your Lead Fuel CRM and look for your test lead. Is it there? Did all the info come through correctly — name, phone, email? If the lead did not show up, the connection between your funnel and CRM is broken and that needs to be fixed before anything else.
Notifications Are Working
When a lead comes in, four things should happen automatically. Check all four:
If any of those did not fire, check your automation settings in the CRM. Also check your spam folder — sometimes notifications end up there.
Step 3 locked in! Your system is capturing leads and sending notifications. Now for the most important part — what YOU do next.
Step 4 — Your Follow-up Game
Here is the truth: the system brings in the leads. You close them. This is where most people drop the ball, so if you nail this part, you are already ahead of 90% of your competition.
Call Within 5 Minutes
When a lead comes in, you have a 5-minute window. Not 30 minutes. Not later tonight. Not tomorrow. Five minutes. The faster you call, the more likely they pick up and the more impressed they are. Speed wins deals.
Your First Call Game Plan
When you get them on the phone, keep it simple and confident:
The 10-Day Follow-Up Sequence
Most people try once or twice and then give up. That is exactly why they are not booking. The magic is in the follow-up. Here is the schedule — check off each day as you build it into your routine:
If you complete this 10-day sequence for every lead, your booking rate will go through the roof. Most of your competitors give up after one try — that is your advantage.
Quick Troubleshooting
Not getting leads? Check these:
Getting leads but not booking? Check these:
Account Admin Check
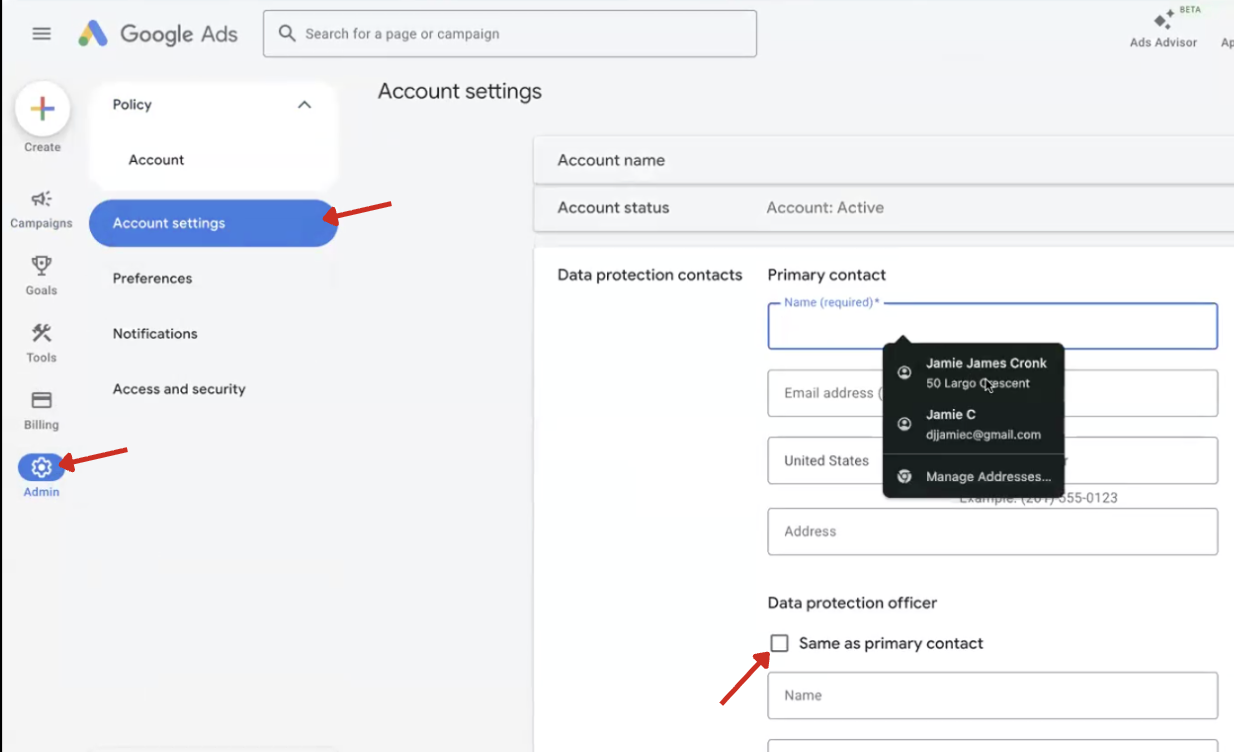
Before wrapping up, verify your Google Ads account settings are correct. Click the "Admin" gear icon in the left sidebar, then go to "Account settings" to confirm your account name, status, and contact information are up to date:
You Are Not Alone
If you have checked everything above and are still stuck, we have your back. Here are two ways to get help right now:
Join the Lead Fuel VIP Facebook Group — connect with hundreds of other business owners, ask questions, and see what is working for them: https://www.facebook.com/groups/leadfuelvipgroup
Jump on a Live Support Call — our team is live Monday through Friday. Pick a time that works for you:
- 12:00 PM CST — Daily training and Q&A
- 5:00 PM CST — Daily training and Q&A
Join here: https://us06web.zoom.us/j/2018794169
Pro tip — if you are not sure where the problem is, record a quick screen share showing your Google Ads dashboard, your funnel, your CRM, and your follow-up process. Share it on a support call or in the Facebook group and we will help you spot the issue fast.
This system works. It has been tested across hundreds of businesses just like yours. When Google Ads, your funnel, and your follow-up are all dialed in, the bookings come in. You have got this.
Need more help? Reach out to us anytime at support@leadfuelcrm.com — we are happy to help.
Have a question or want to connect with other Lead Fuel users? Join the Lead Fuel VIP Facebook Group